
New Work Flow Recap

Sense I have been very focused on creating and vetting my new workflow process, I figured I would do a consolidation post with everything in one, albeit with less details, so if you want more insight into the why, you would want to read the previous individual work flow posts.
My work flow starting point is really when the images are imported into Lightroom, prior to that I am really just focused on capturing them correctly. I know some cameras will allow you to do some tagging, rating, and other features in camera at the time of capture, but I don’t use any of those.
Importing into Lightroom:
With the image card inserted into my MacBook I open the Lightroom Import dialog and the process starts.
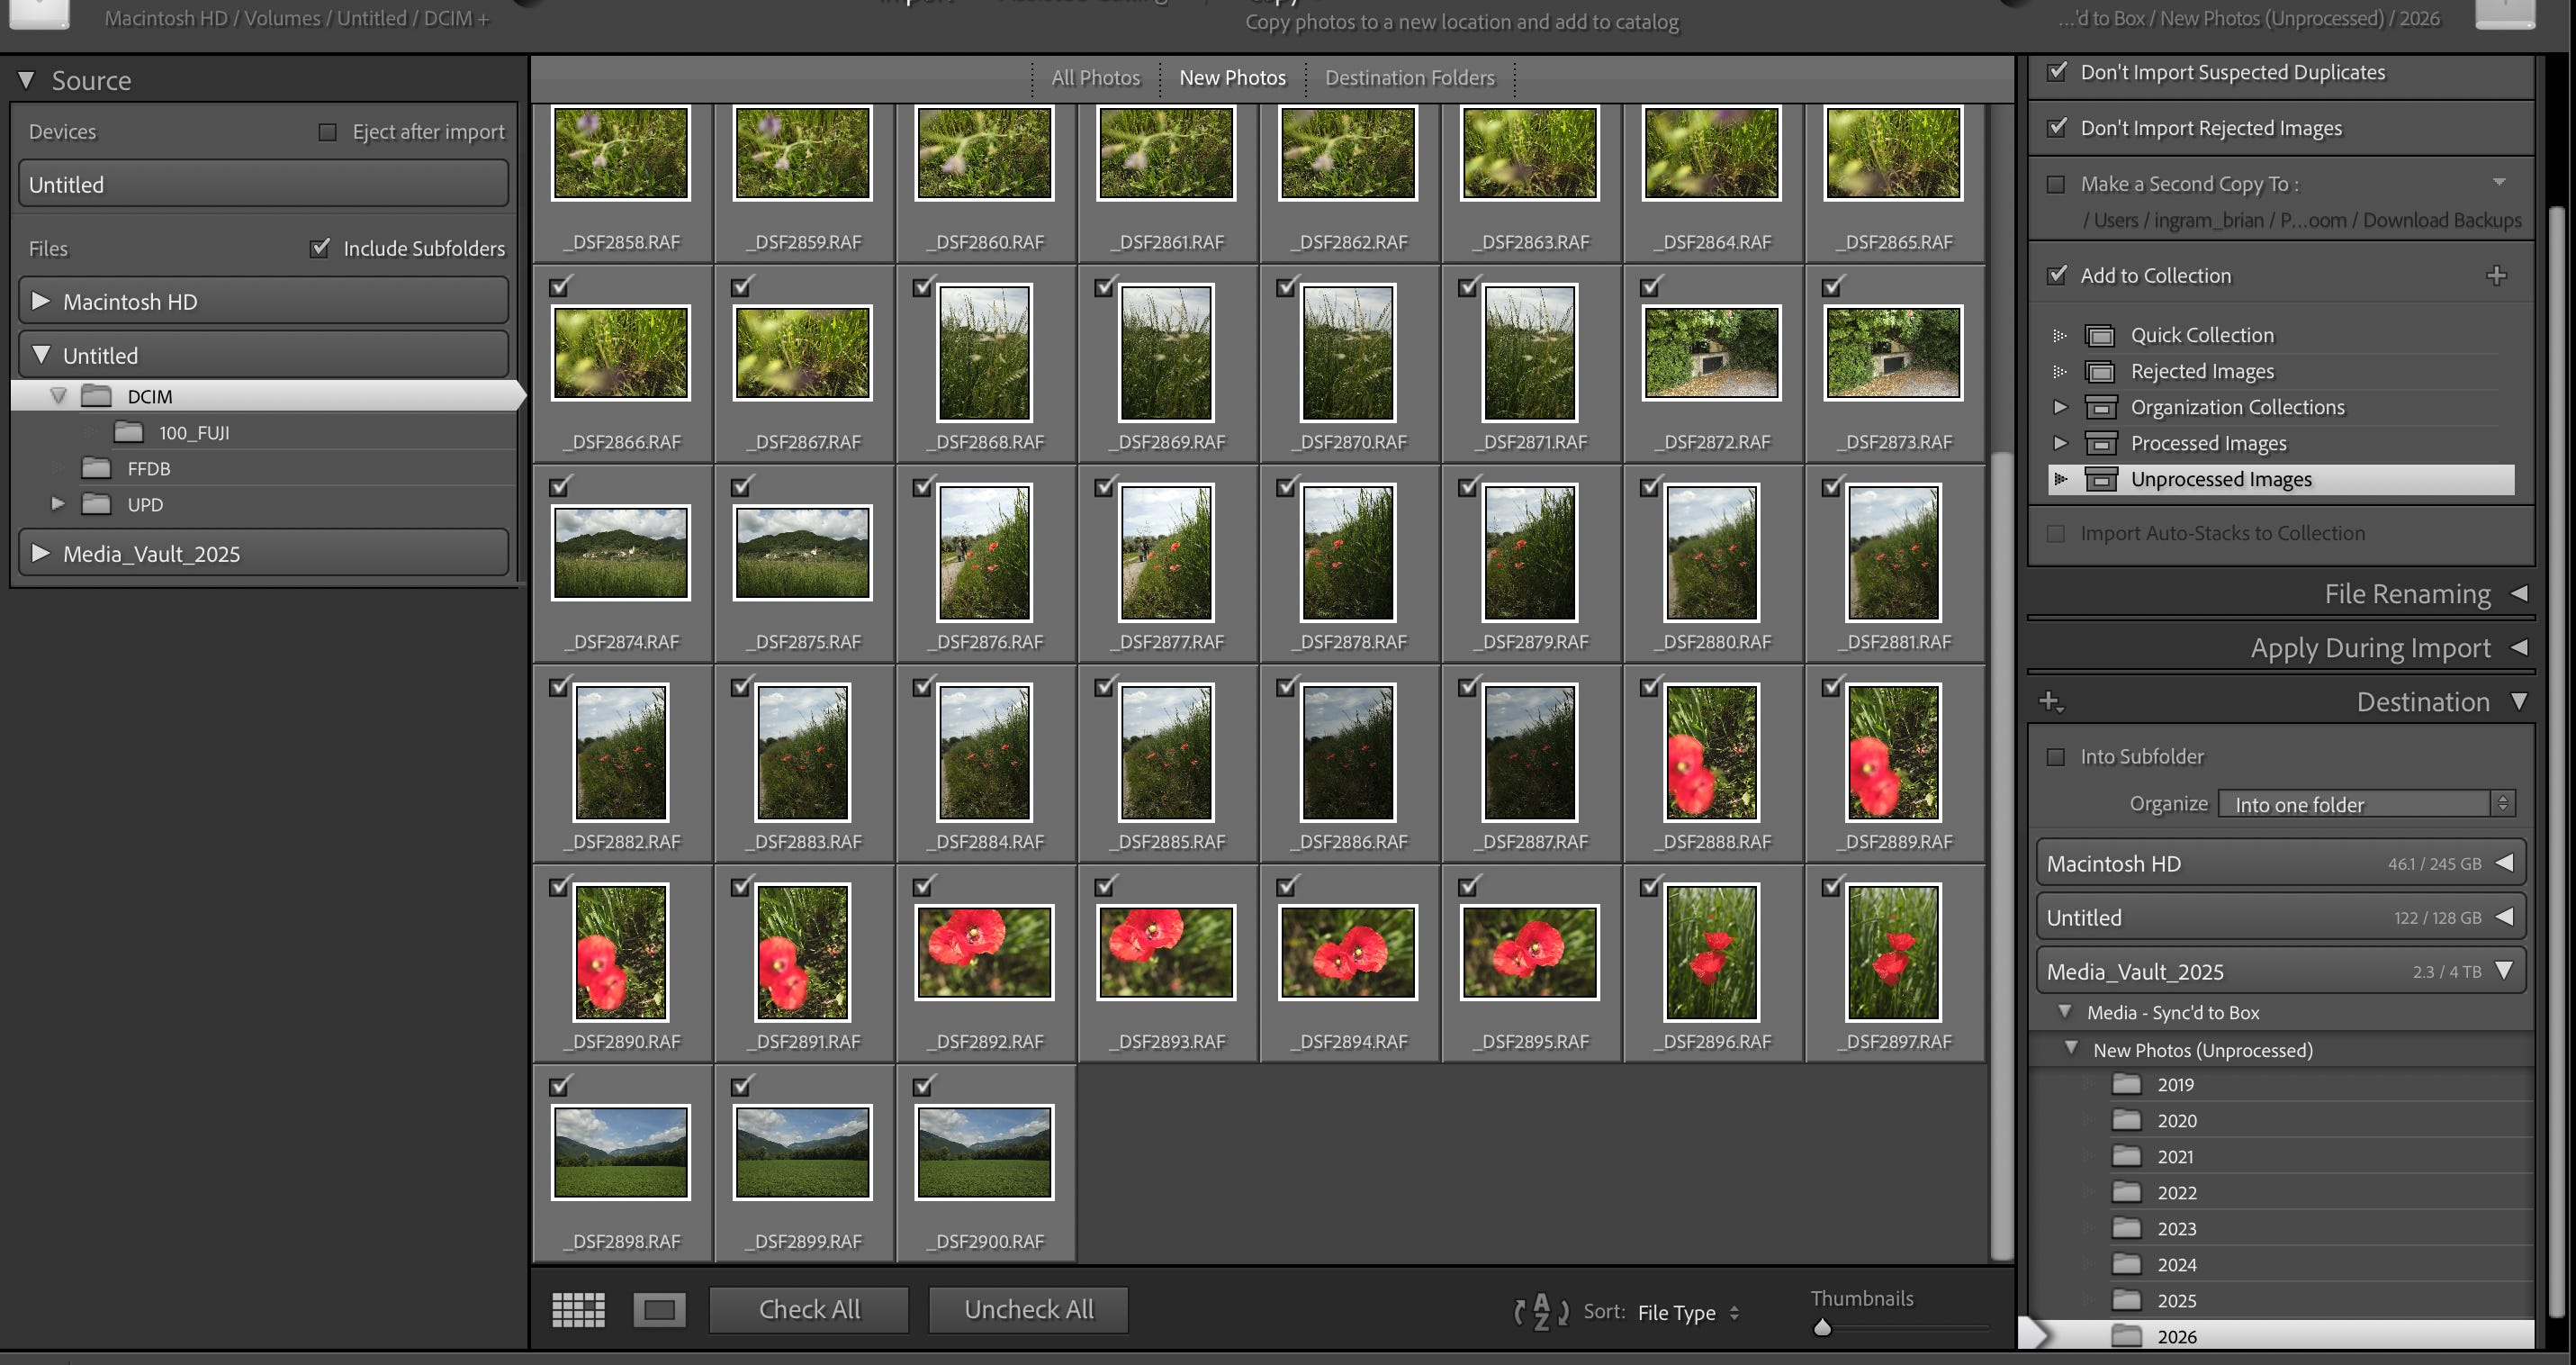
When I import images I add them directly to a collection in the Unprocessed Images Collection Set. If there are multiple collections of images being imported I will only select the images for the first collection, then repeat the process for each other collection I am importing images for.
I create a standard preview and a smart preview for each image. I primarily work off the smart previews for editing, then export the original with the edits applied.
I apply my standard initial settings to each image as it is imported and add Copyright information to the metadata and some specific location Keywords.
The original Raw file is copied to an external SSD under the current year folder under the Unprocessed Images section.
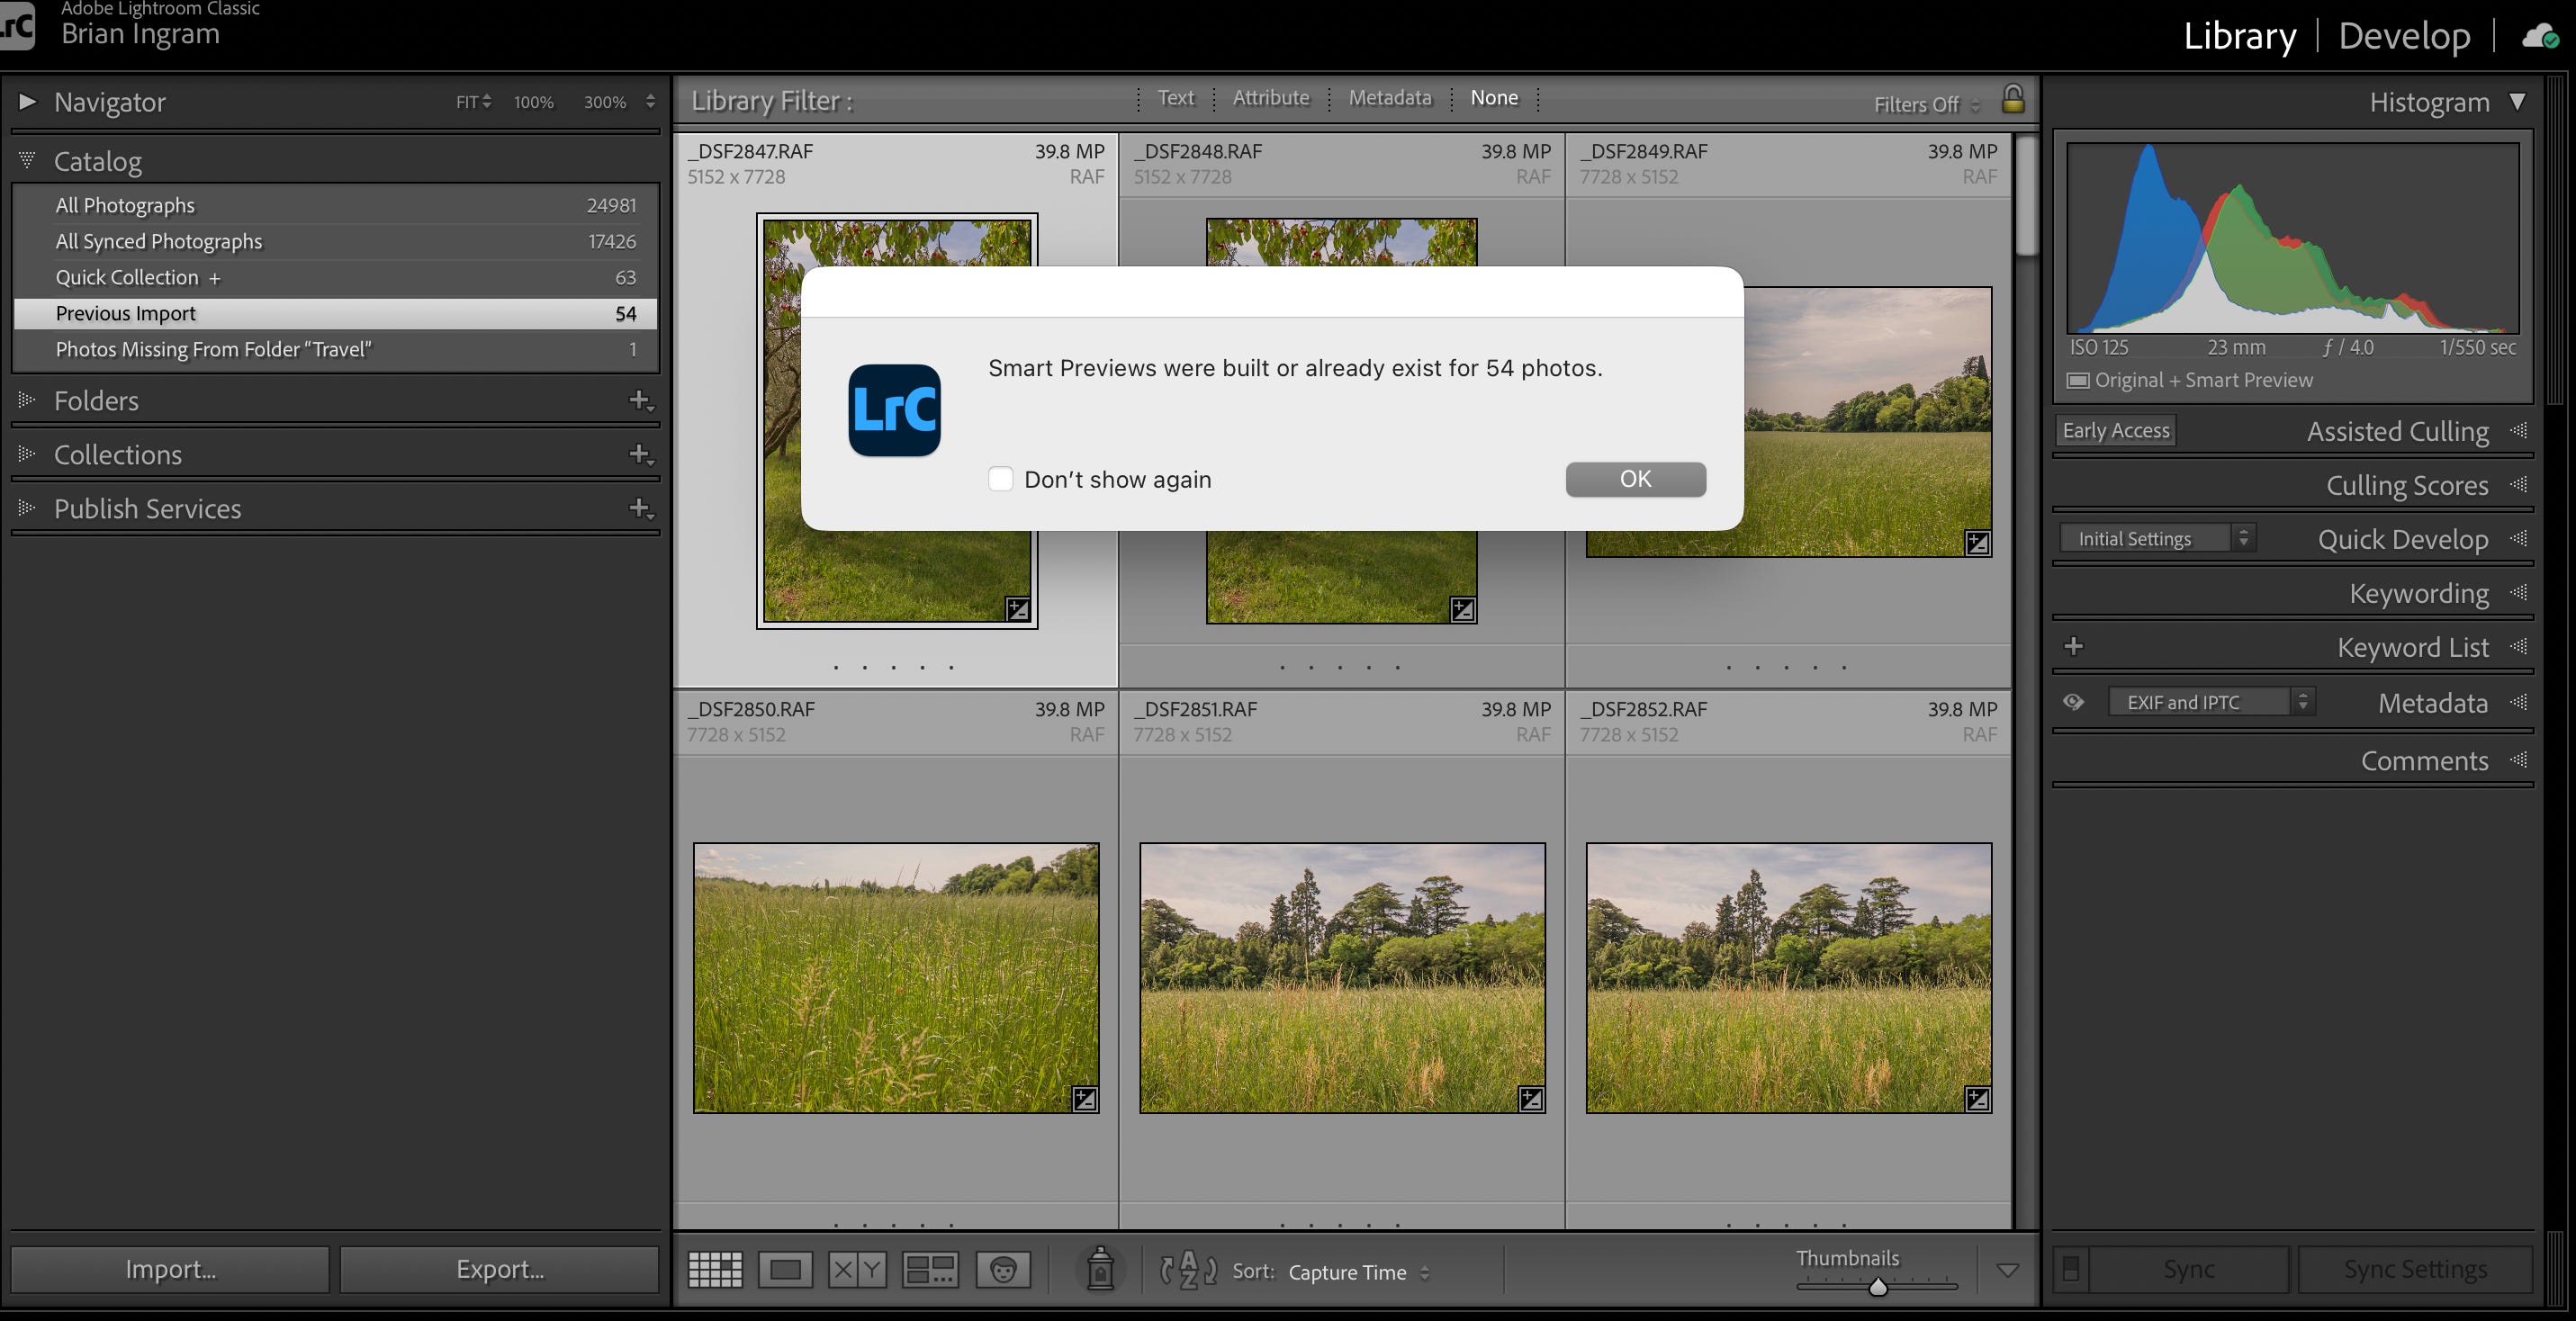
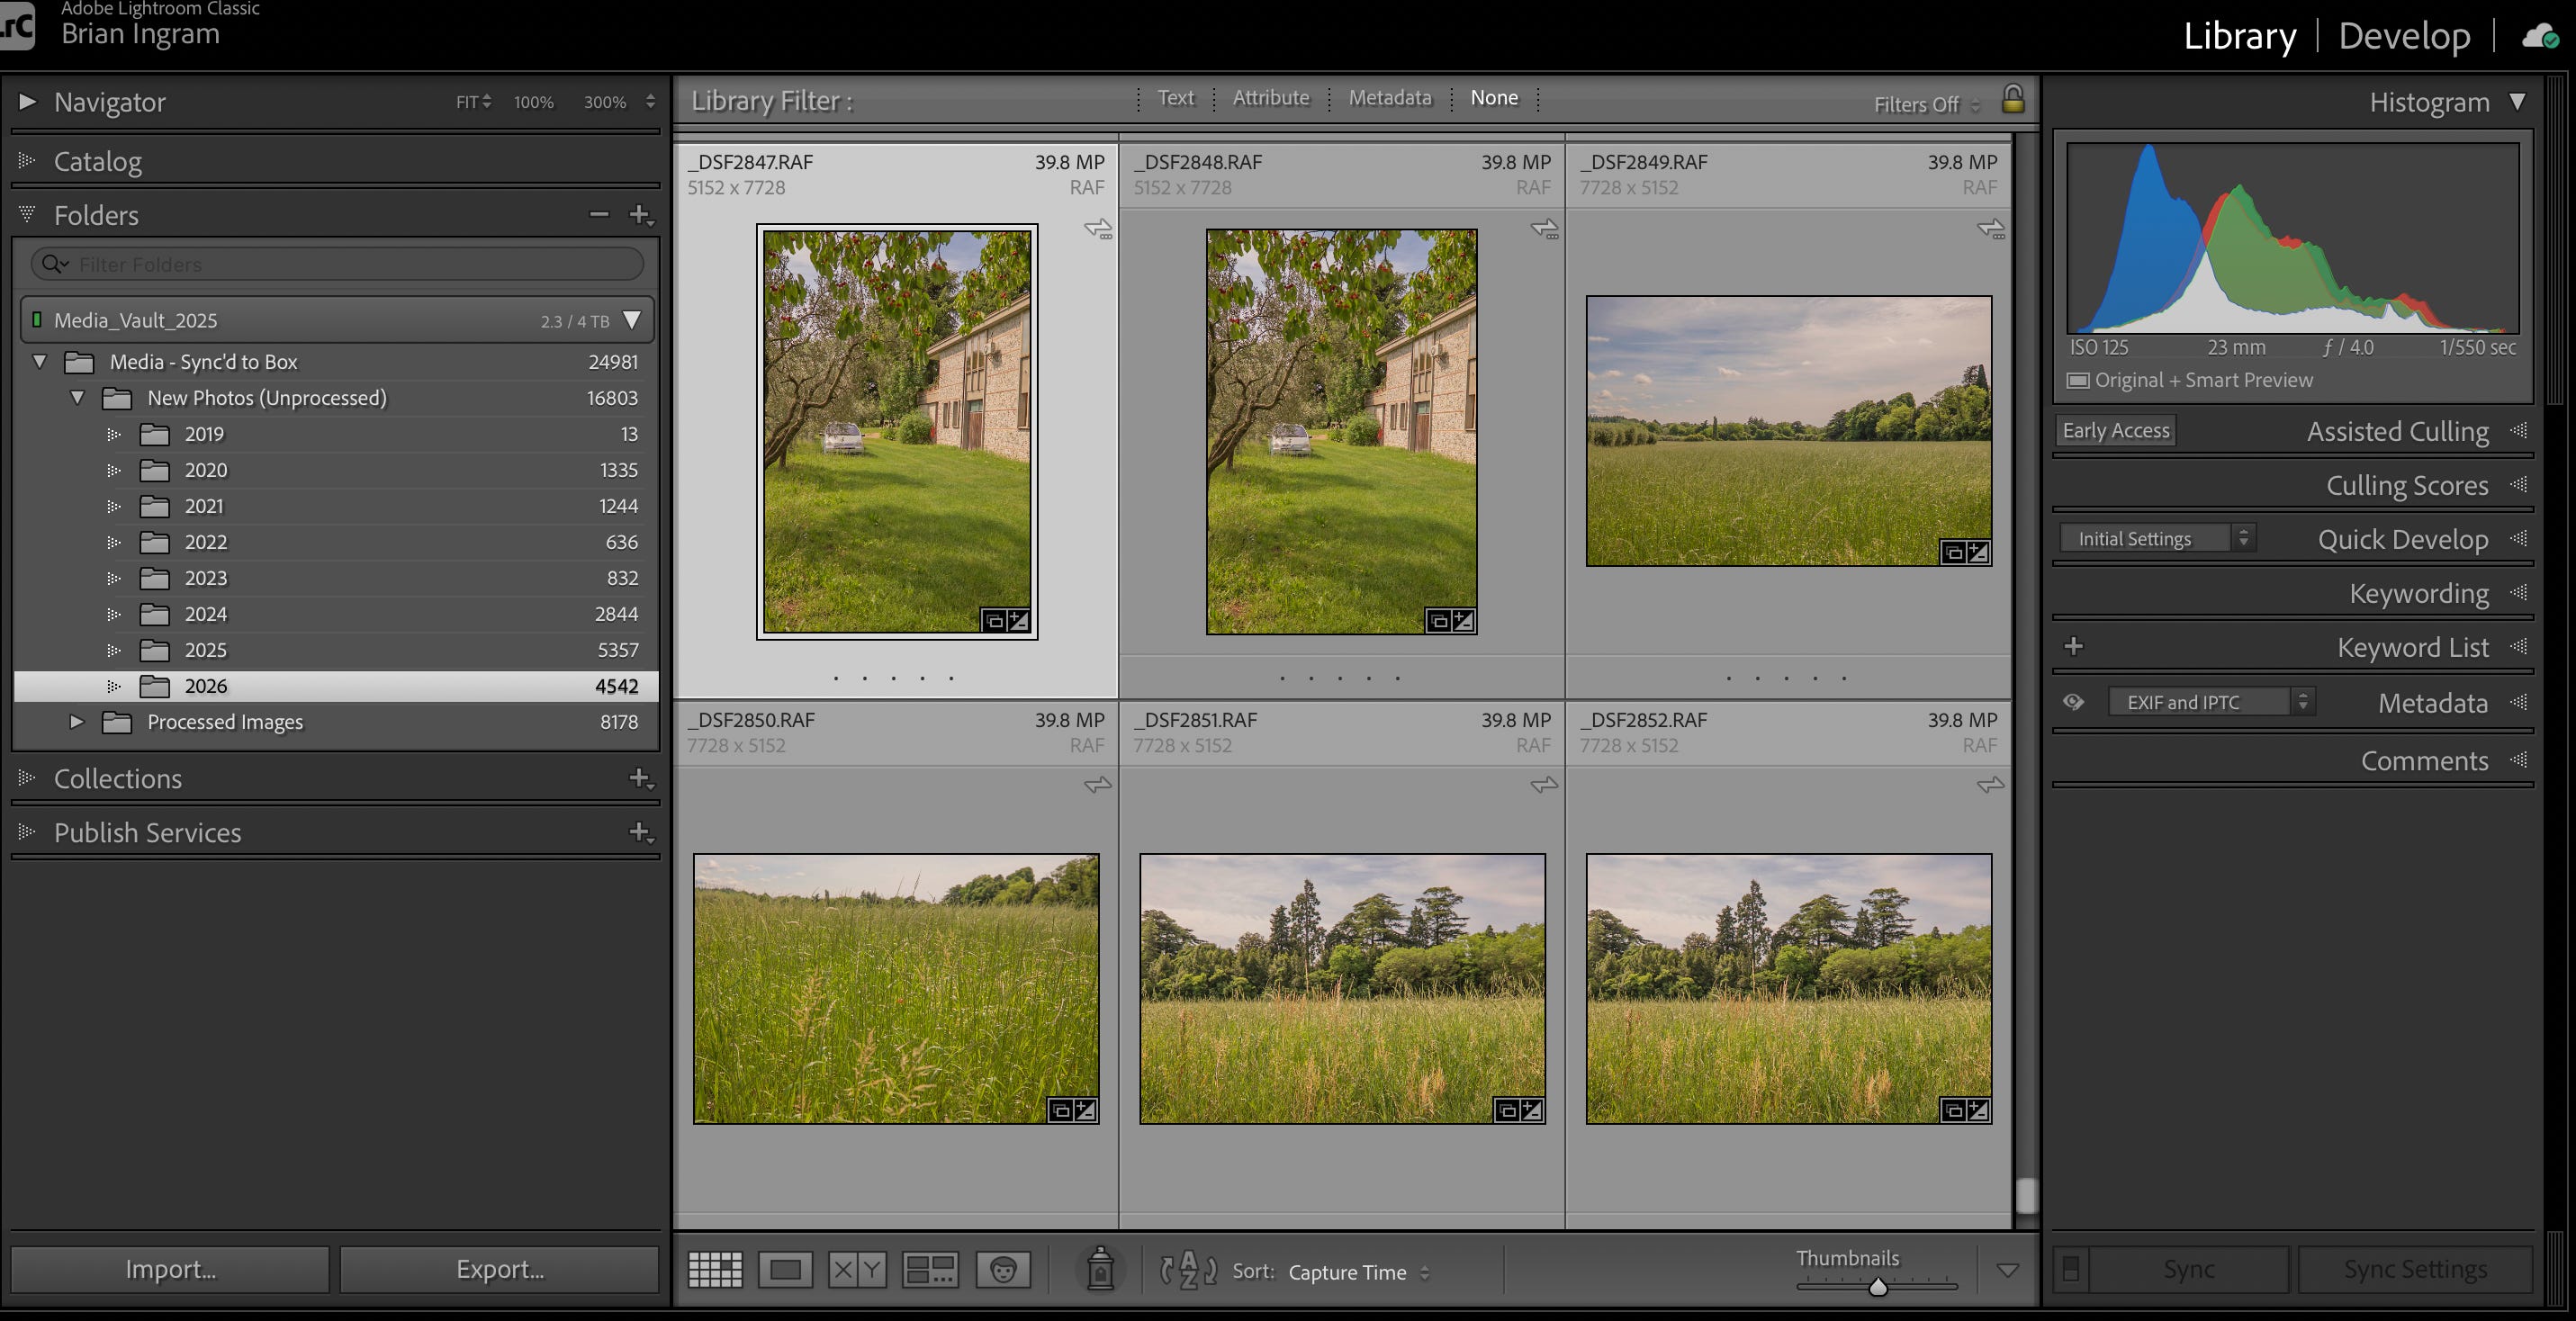
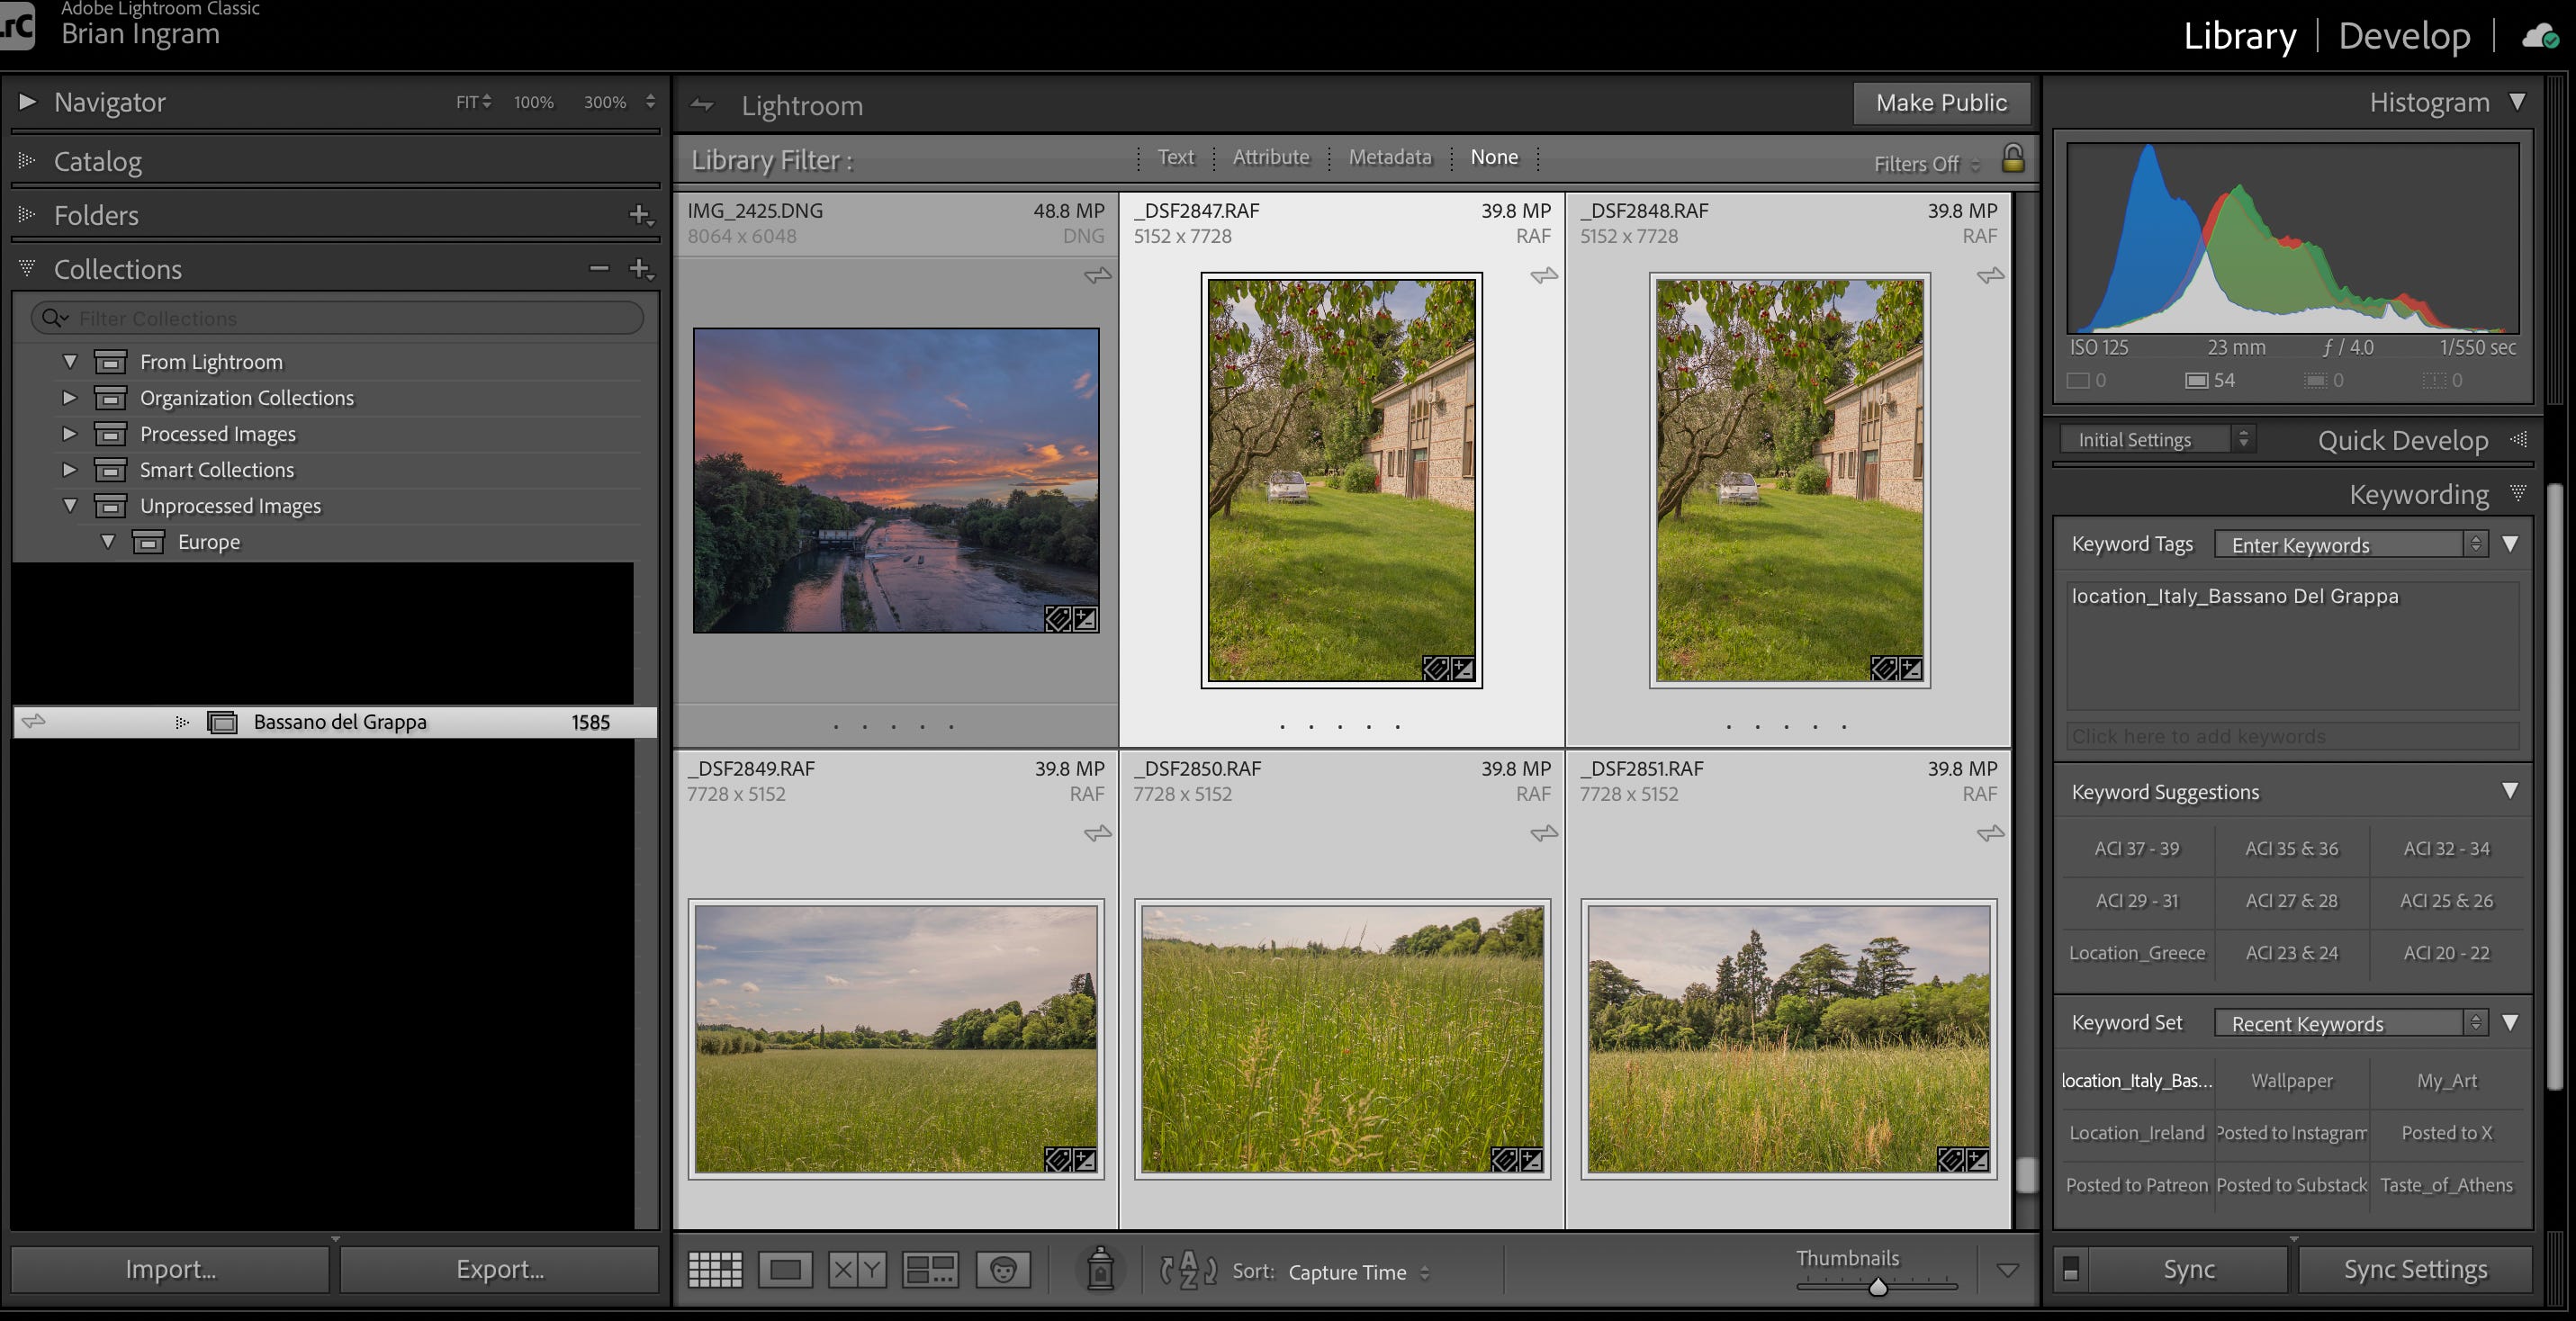
Now the images are in the right folder on the external drive, in the correct unprocessed collection, with standard and smart previews created. Lightroom has a nice feature in that it automatically adds the most recent imported images to a previously imported catalog, so you can easily find all the images that you just imported if you need to do something with them all.
Editing Images:
At this point, new images sit until I get around to editing them or using them for something. Unprocessed images will not have any color associated with them. Once I start the editing process I will go through my normal routine (not something I have detailed yet, maybe in a later post). As I edit an image I often see things in the image that may encourage different types of editing treatments, the easiest of which to visualize is the idea that an image can have a color and black and white treatment. To achieve this I will create snapshots of the image in various states, finished color, finished black and white, perhaps something more artistic.
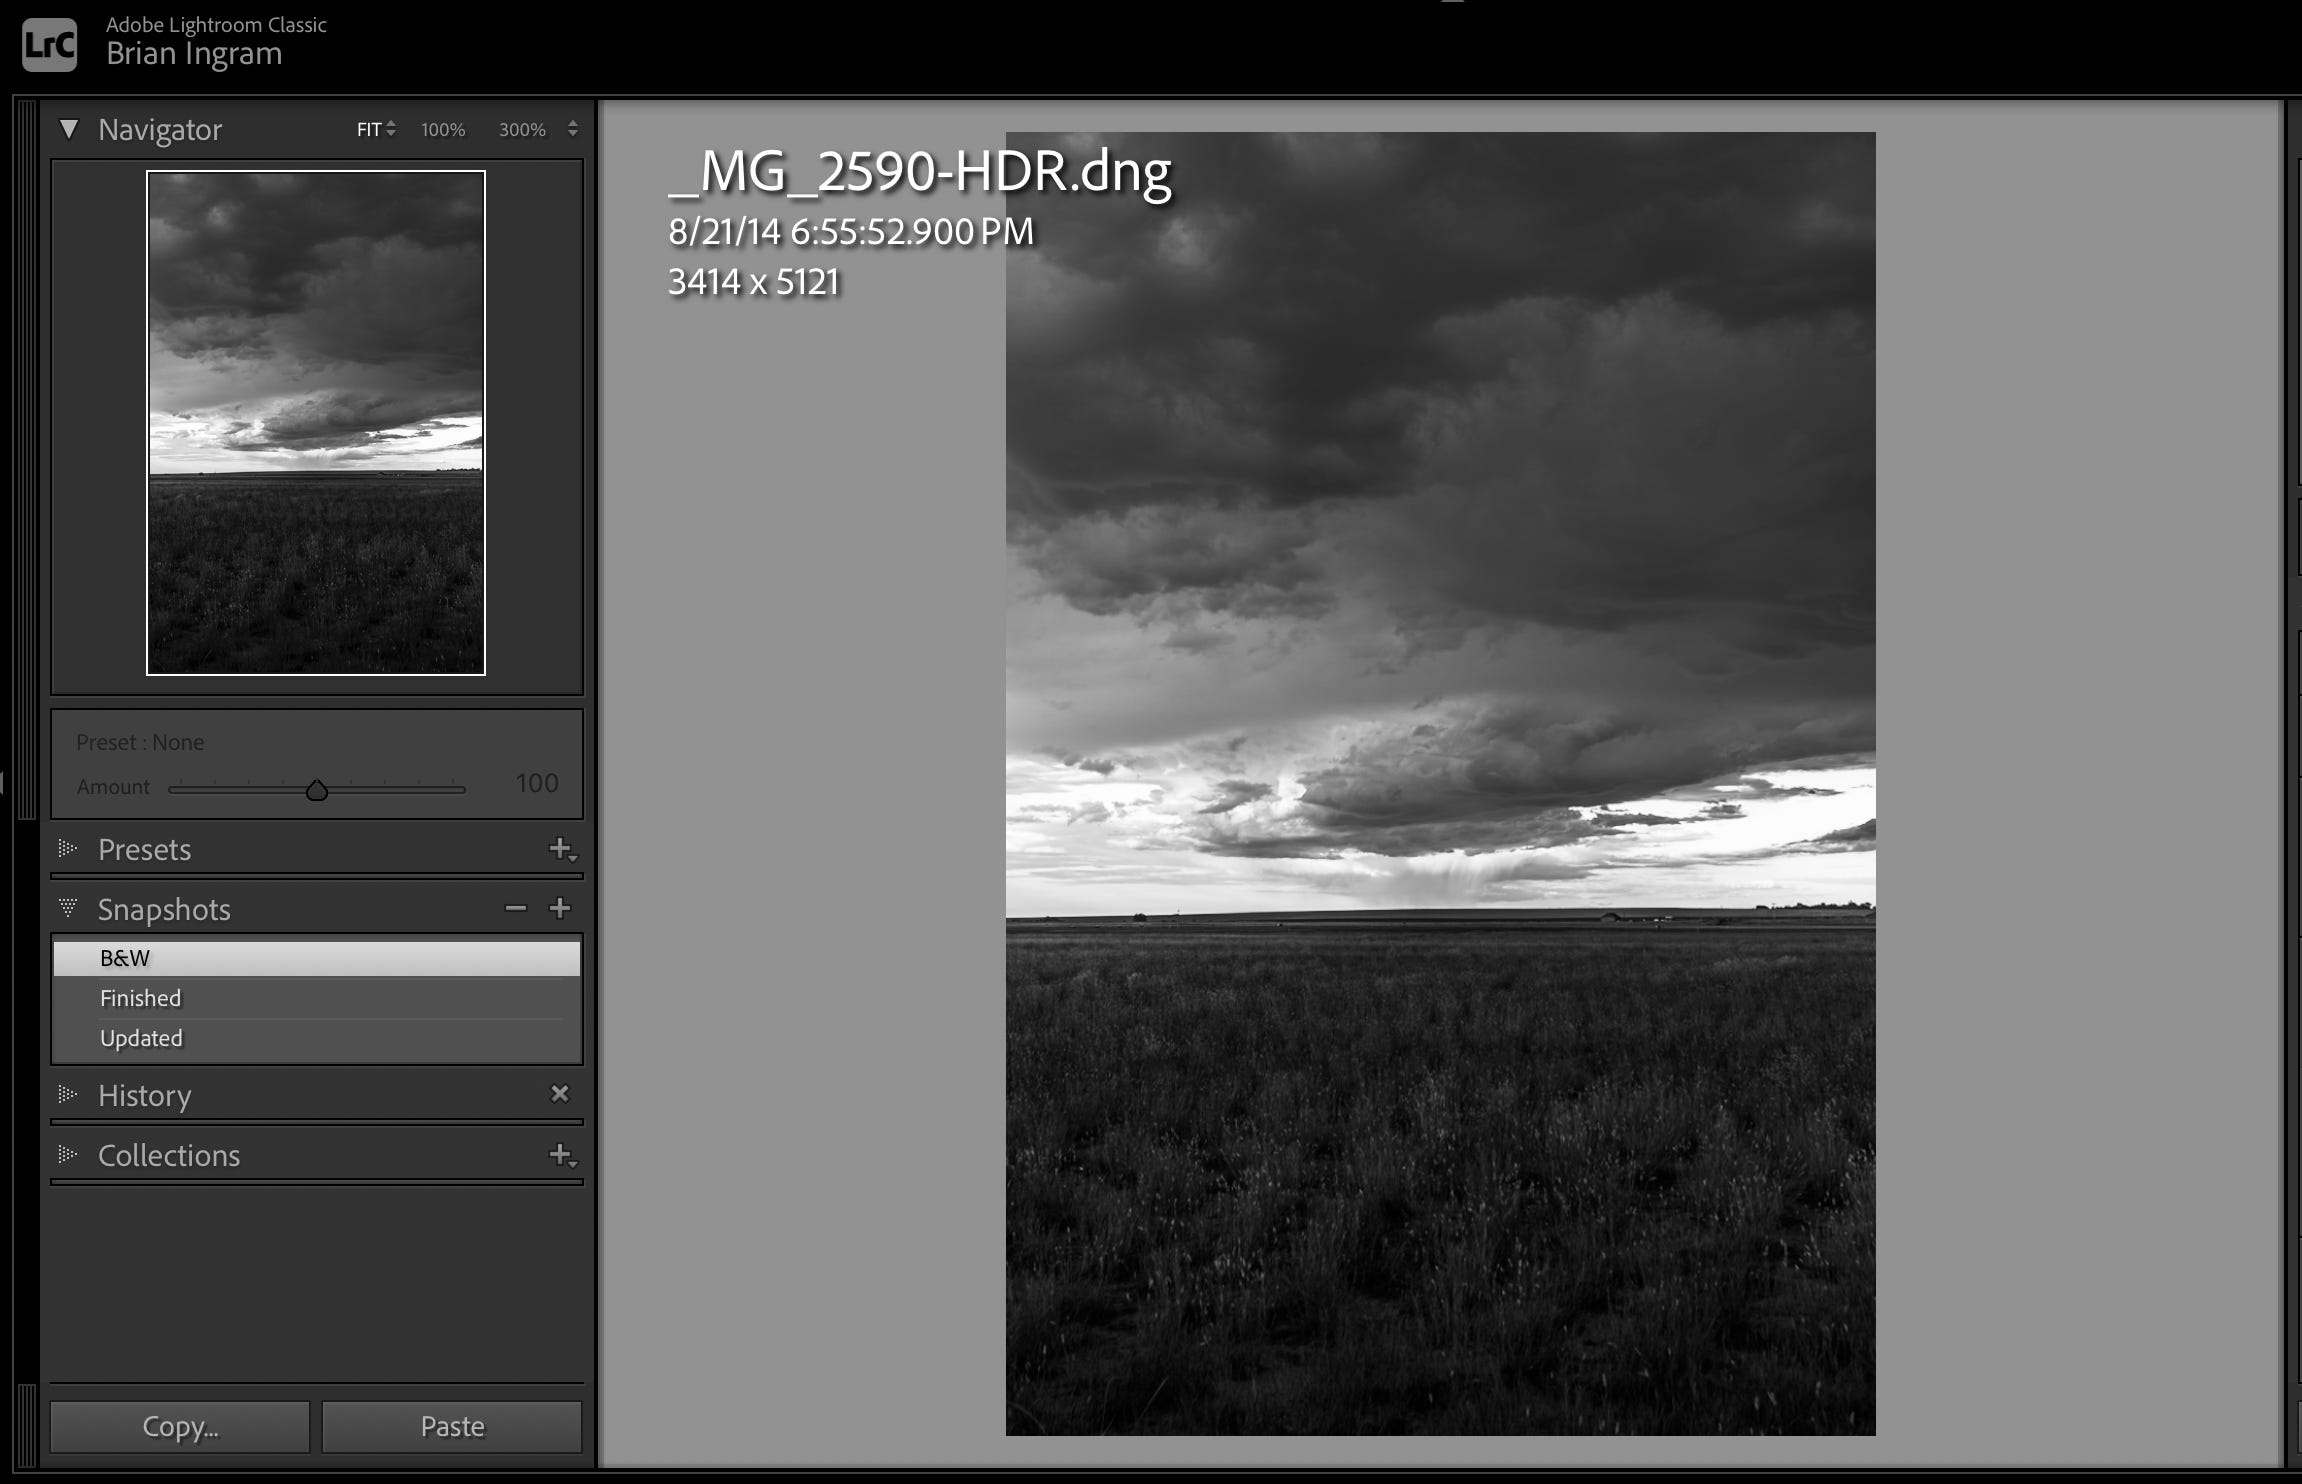
If I feel strongly that the image works with multiple treatments I will create a virtual copy for each treatment and treat the images as separate original files.
Once an image is processed it is moved to the appropriate collection for processed images and the image is moved from the Unprocessed folder structure to the correct location in the Processed folder structure. Rejected Images are sent to a Rejected Image collection and eventually deleted from Lightroom and my drive.
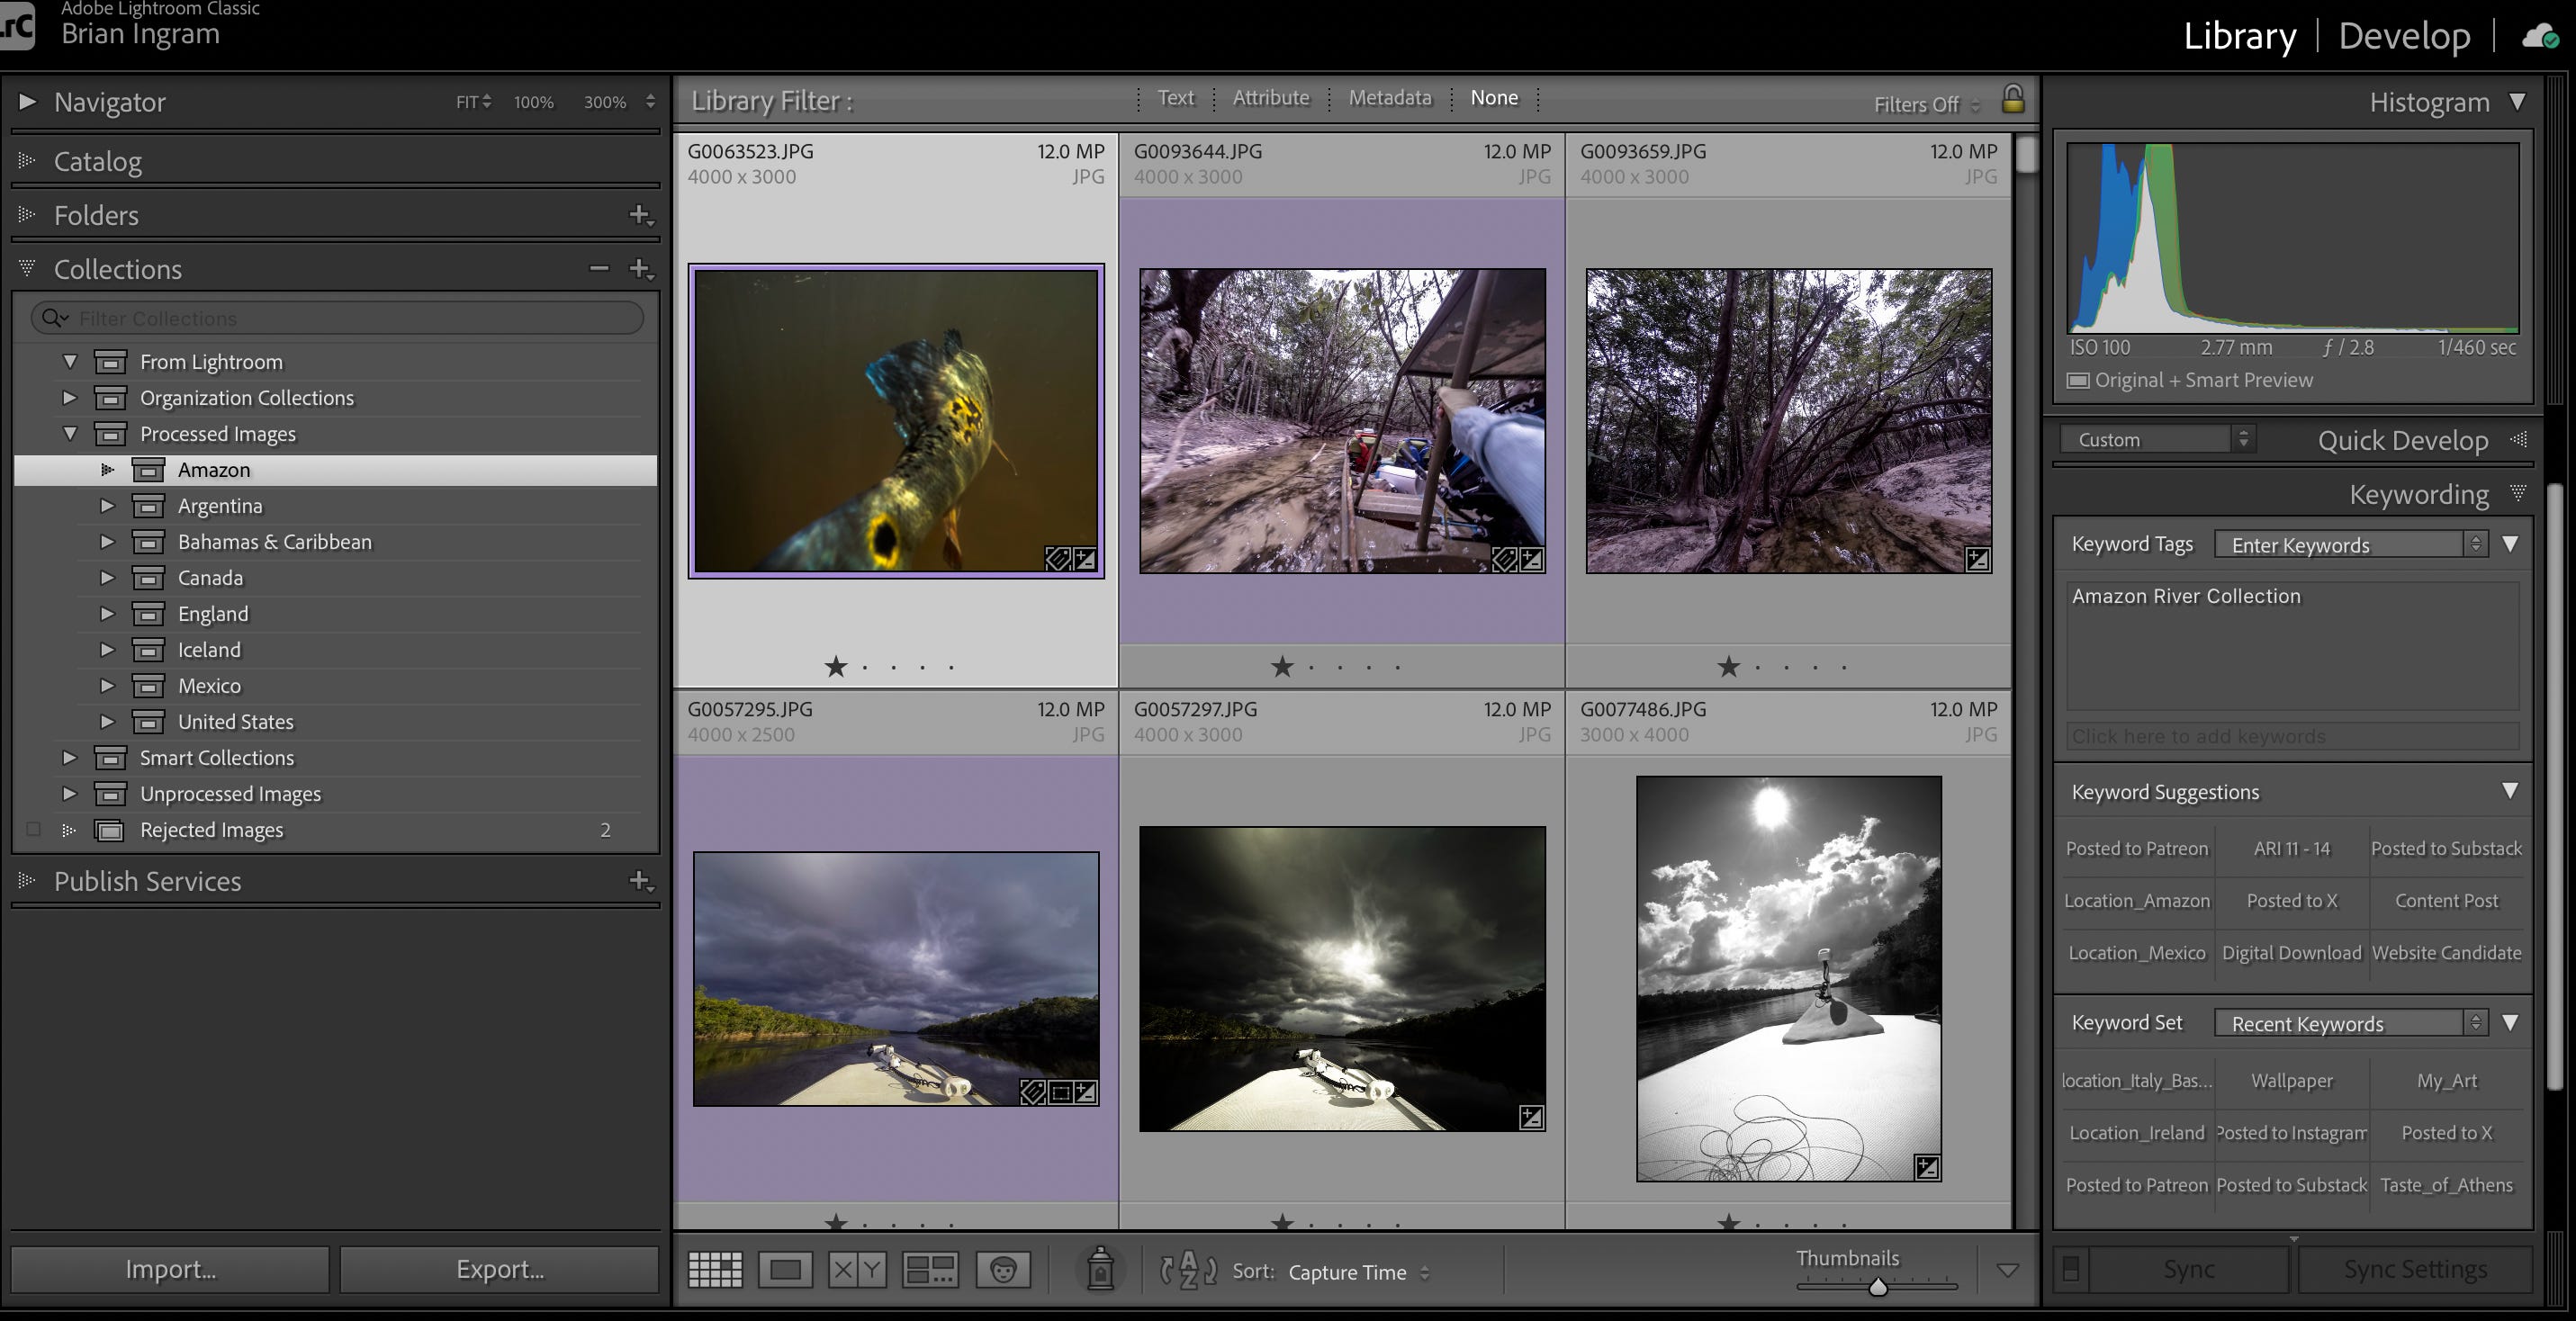
Once the images are processed and in the processed images collections I review them and determine if they are worthy of being shared or posted to social media. If they are, they are tagged with the appropriate Keyword to be picked up by the Organizational smart collection structure. In the picture, the highlighted image has the Amazon River Collection Keyword, this triggers the Organizational Smart Collection to pick up the image. Once it is in the organizational structure I color the image purple, telling me that in this view the image is already selected for sharing and posting to social media. Images that are Grey (default no color) are processed but not seen as being acceptable for sharing. I may change my mind and tag them at any time, or reprocess them and tag them, but this way I can easily see if they are included already or not.
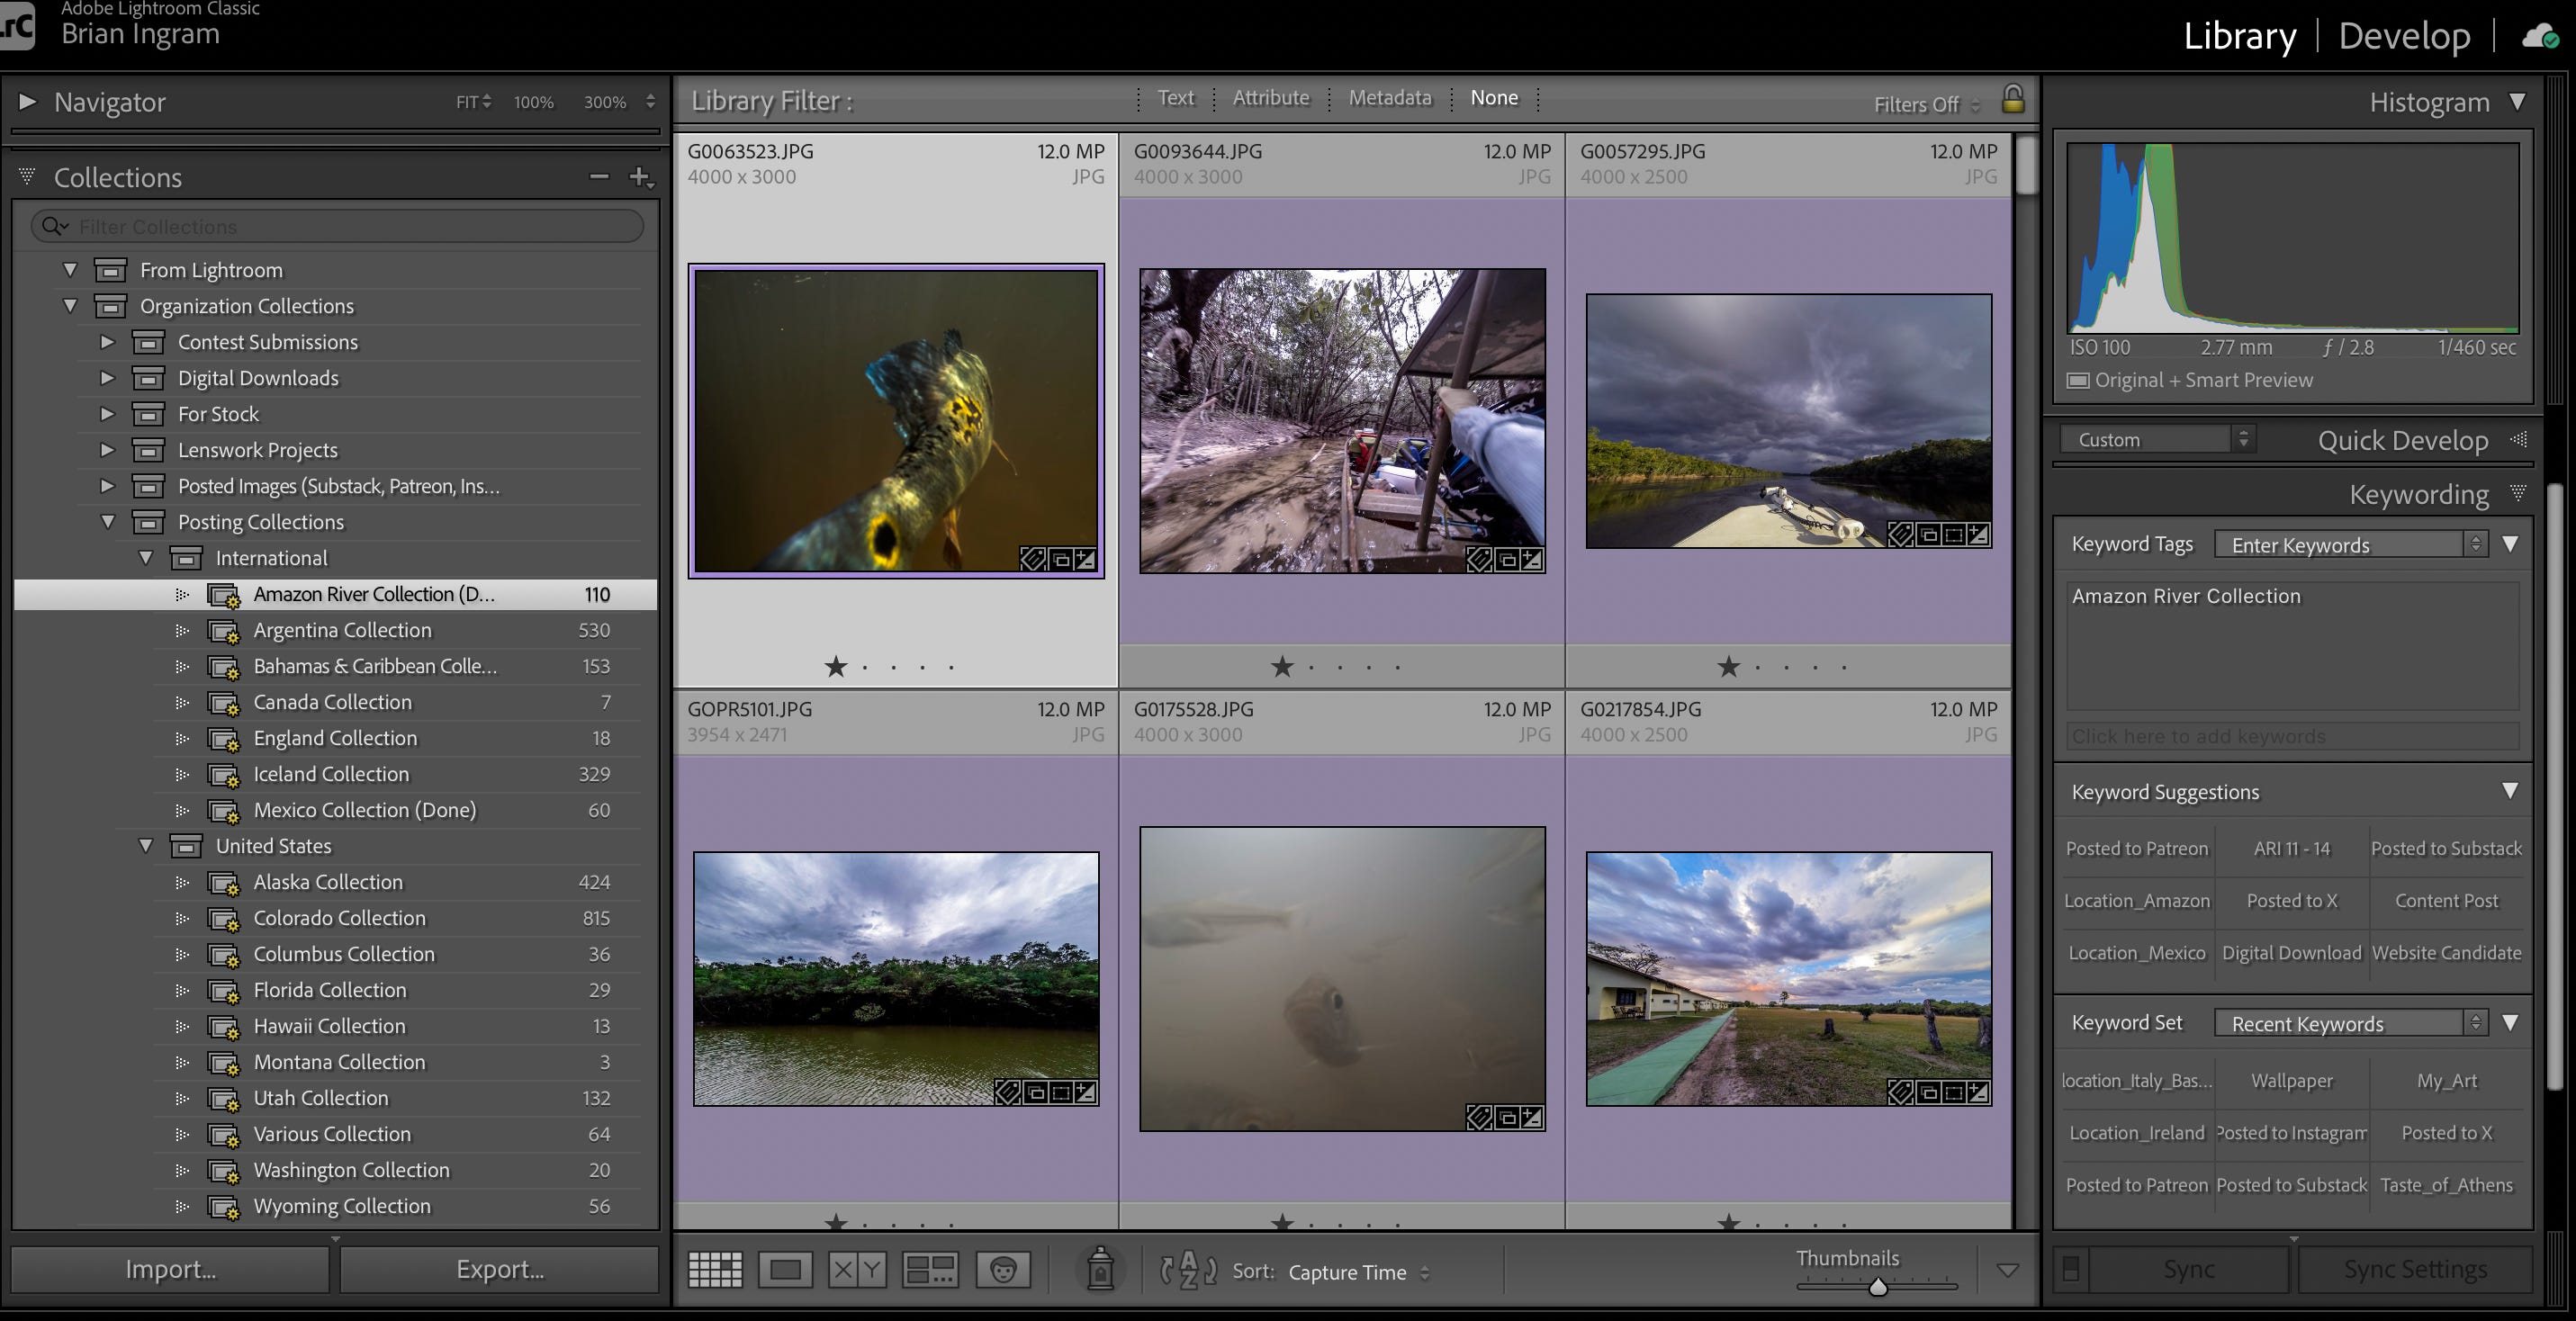
Once the image is tagged to be part of the collection, it is picked up by the smart collection and available with all the other images in that collection.
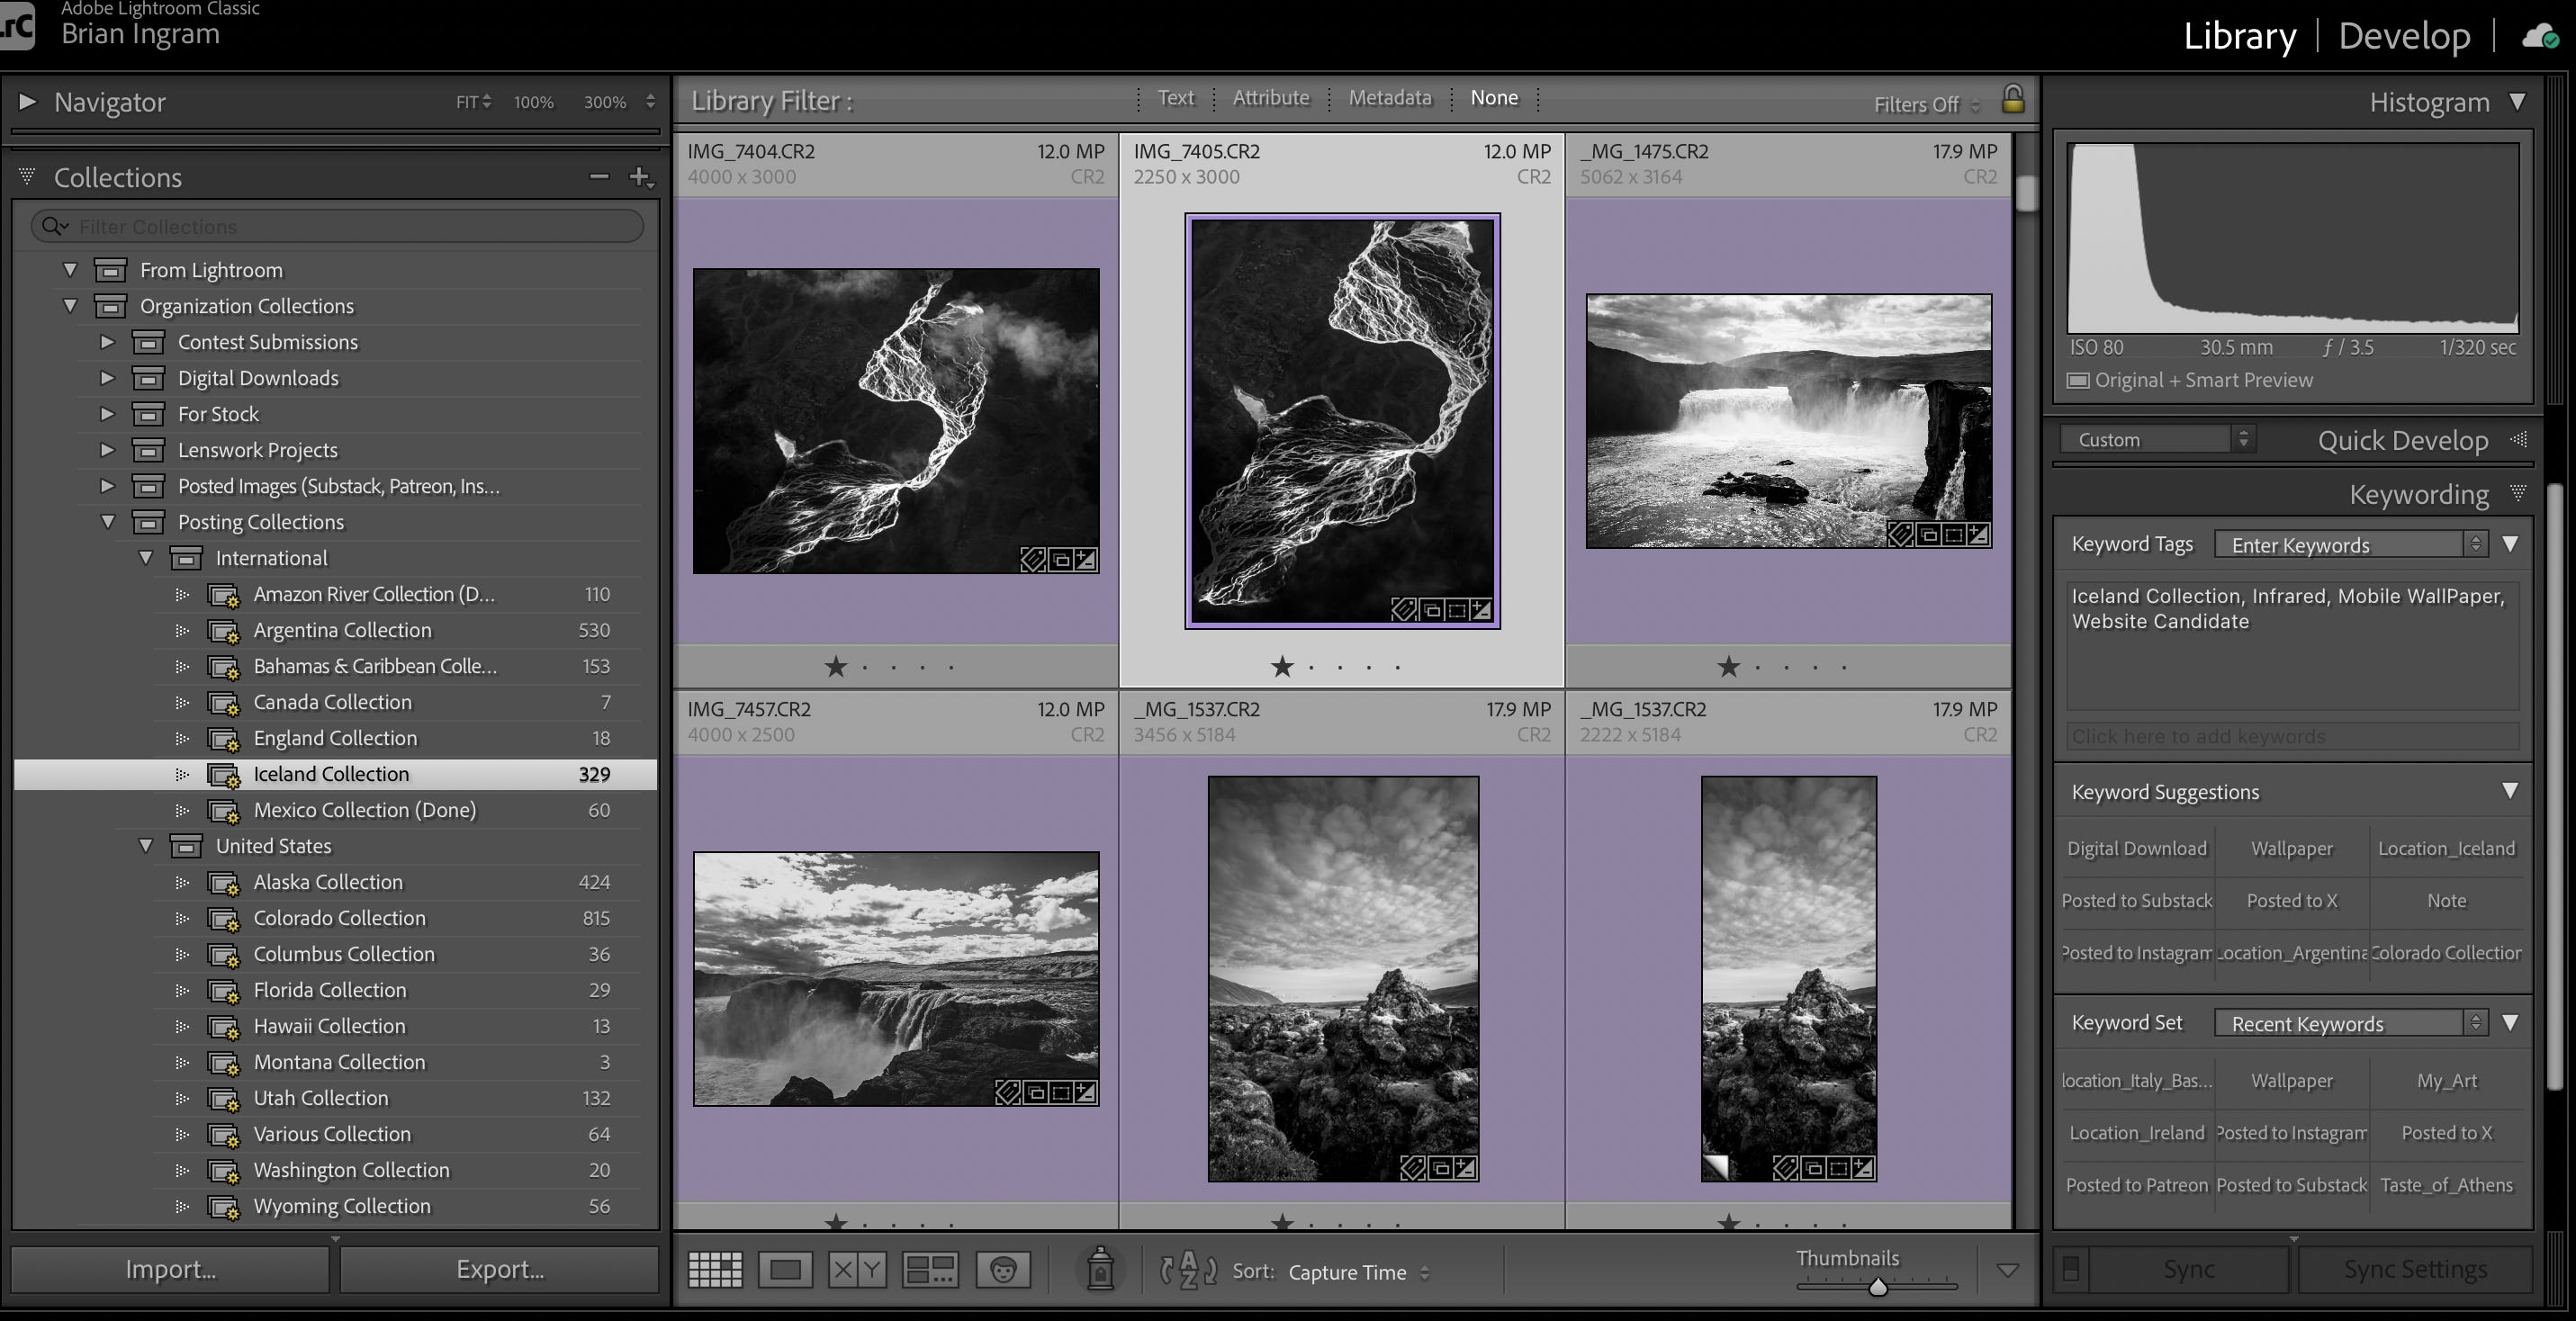
From here I review them and tag them for where they are supposed to go, a contest, a stock photography service, a special project, as well as the set they belong to for sharing to subscribers on Substack and Patreon. If I decide to share them to Social Media, they are tagged at the time and they are automatically added to those collections as well.
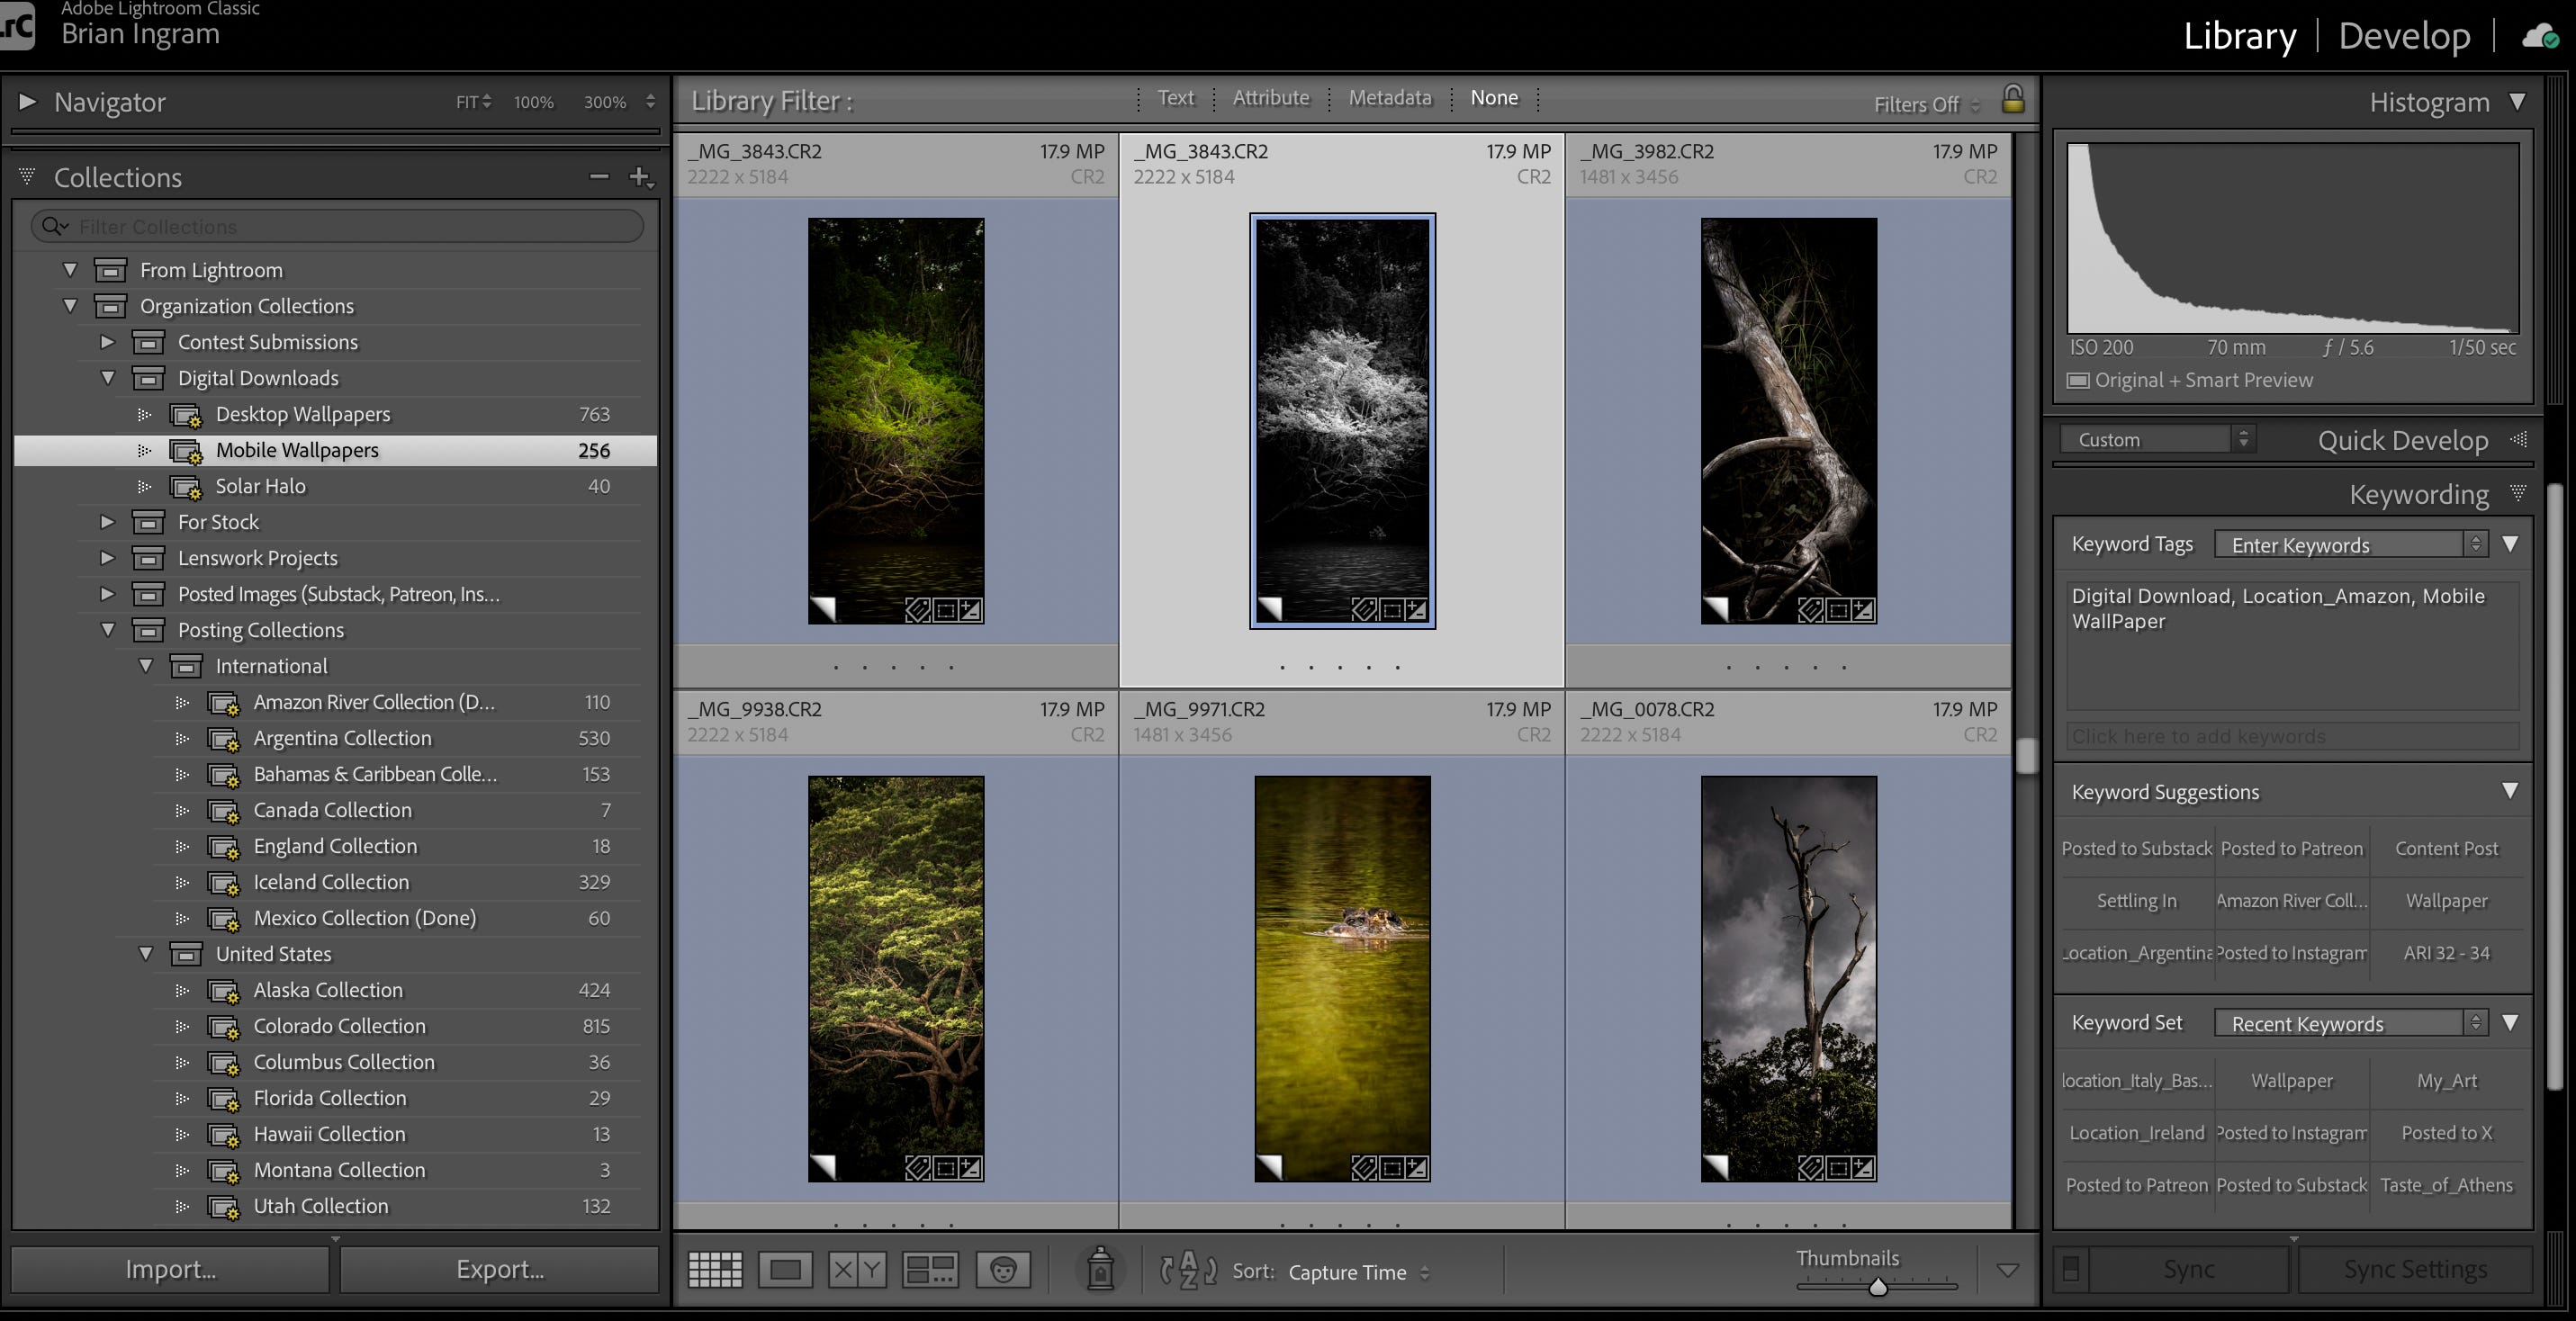
Now comes the sort of tricky part that I have to remember. All the images in the Posting Collections collection set are colored purple indicating that they are essentially an “acceptable image for use.” Once I tag that image with additional Keywords the image is included in the “Usage” collections like “Mobile Wallpaper”. I need to go to the Mobile Wallpaper collection, find the purple image (the one I just added) and then create a virtual copy of it, then remove the Mobile Wallpaper tag from the purple image (it will then be removed from the Mobile Wallpaper collection. The virtual copy will remain (giving me a static state of the image as it was when it was used). I then color the Virtual Copy blue indicating that it was used for that purpose in that state.
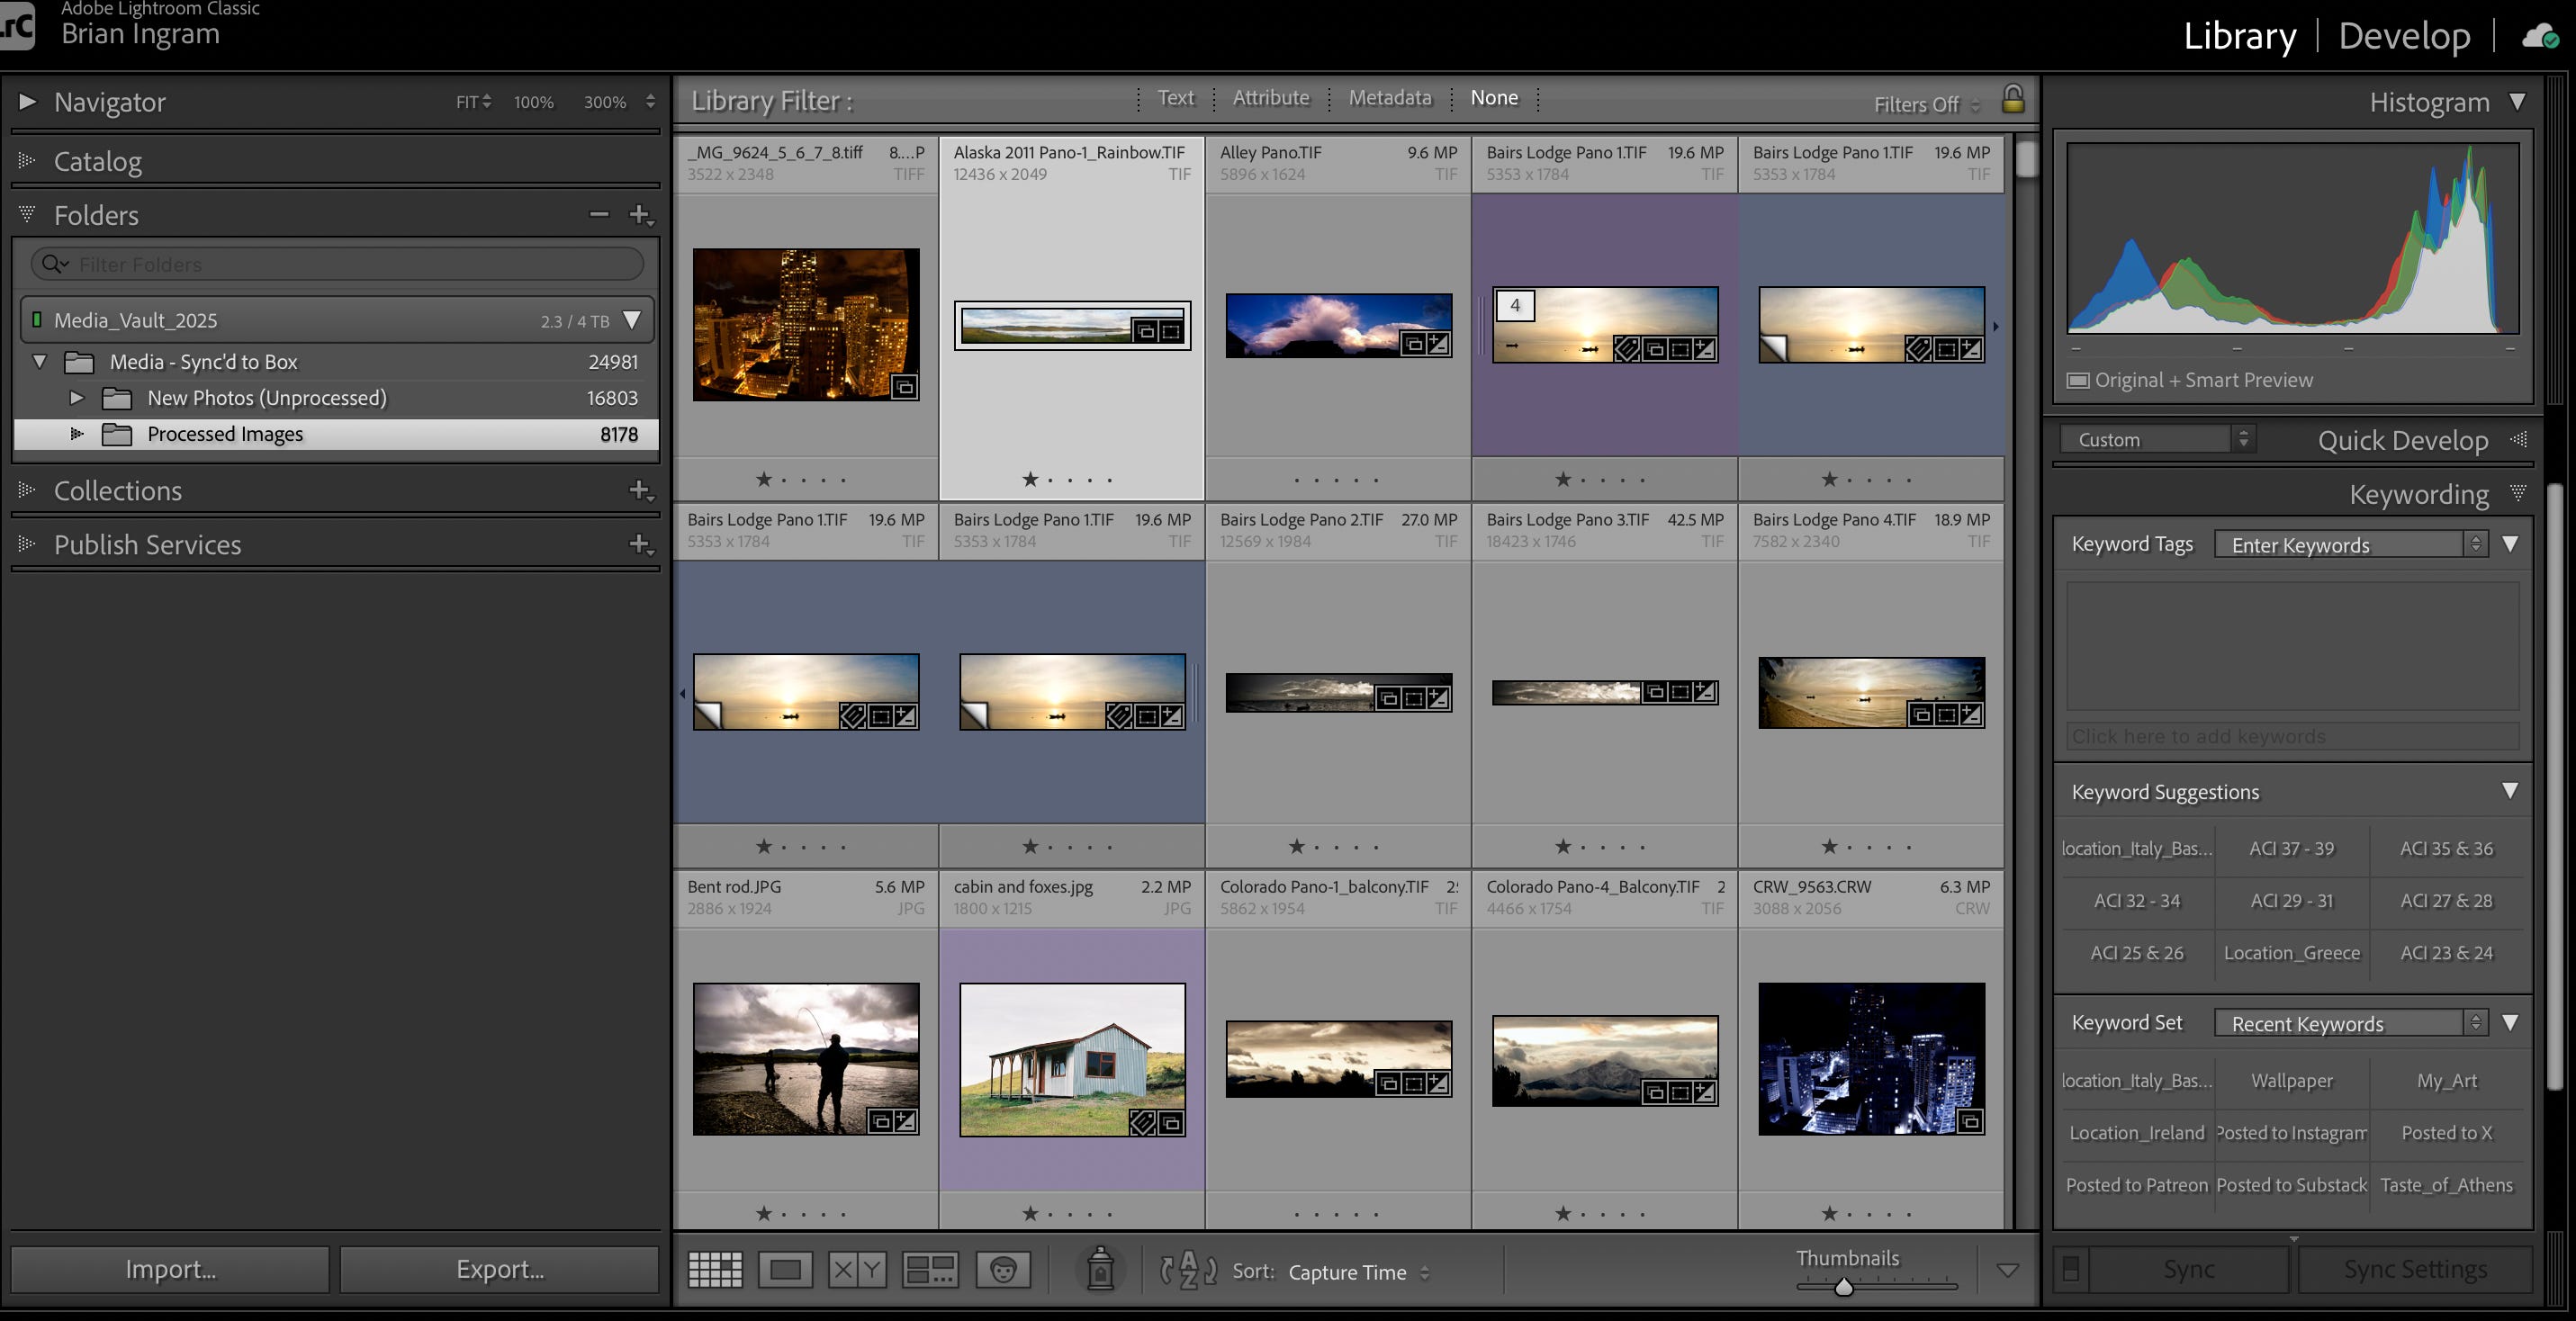
Going back to the folder view of the images (this is the Processed images folder) I can see processed images that were selected for sharing (purple) and virtual copies of those images (blue) stacked together. Selecting the blue virtual copy of an image shows you the keywords, indicating where the image was used and preserving the state of the image at the time it was used.
Hopefully that provides a good summary of my new organizational work flow and provides some insights and details to anyone that wants to try it for themselves (entirely or in part). Feel free to ask any questions or reach out directly if you would like.
As I mentioned in the last post, we have some traveling coming up so posts might be slim for the next few weeks. I am working on a better mobile solution, but it is untested, so no promising anything.
As always, hope you have enjoyed the images and my ramblings. If you did, consider supporting the work, by subscribing and sharing with others that may enjoy this as well.
Thanks,
Brian